

Overview
The PowerConnect Java agent can be installed as an application on a SAP Business Objects Tomcat instance to monitor job metrics and logs, java virtual machine metrics and operating system metrics (cpu, memory, disk etc.)
Hardware Requirements
-
x86 64-bit chip architecture
-
1 CPU cores at 2GHz or greater
-
256 MB RAM
Software Requirements
-
SAP Business Objects 4.2 or 4.3
Network Requirements
-
HTTP or HTTPS outbound to send data to the target platform
Pre-Installation Steps
The PowerConnect Business Objects agent requires:
-
A user to connect to the Business Objects APIs and JMX interface to collect metrics
-
JMX to be enabled in the Business Objects platform
-
A configuration file to be created to store it’s configuration
The step to achieve these are detailed below:
PowerConnect User creation
-
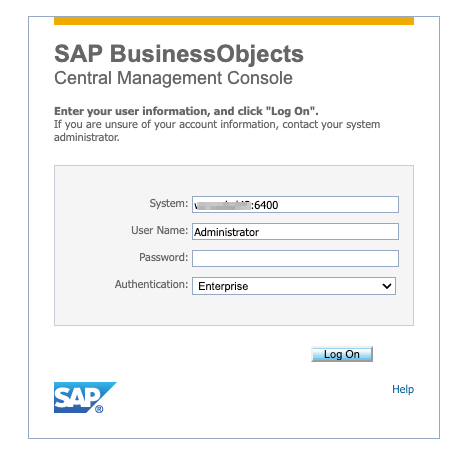
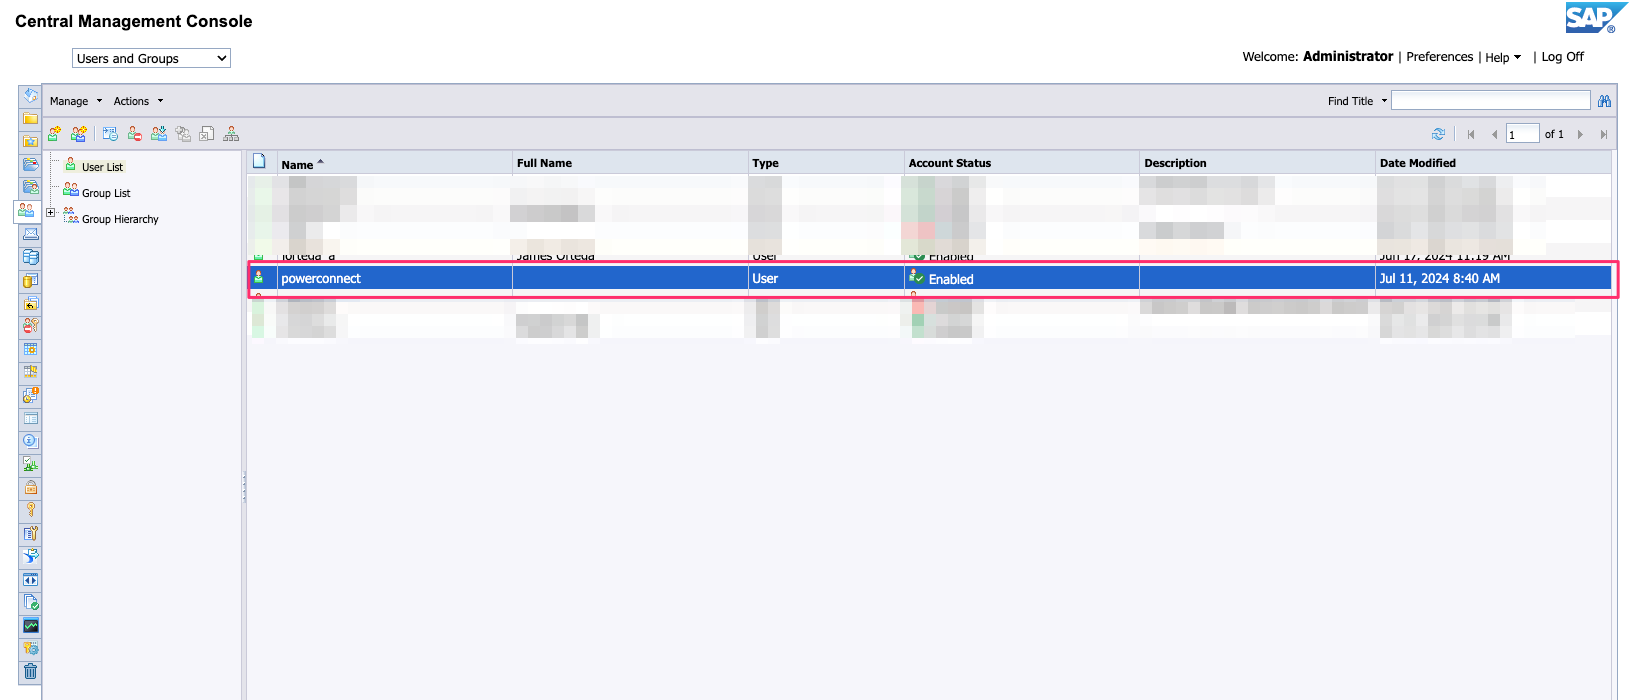
Login to the SAP Business Objects CMS console as a Administrator user
-
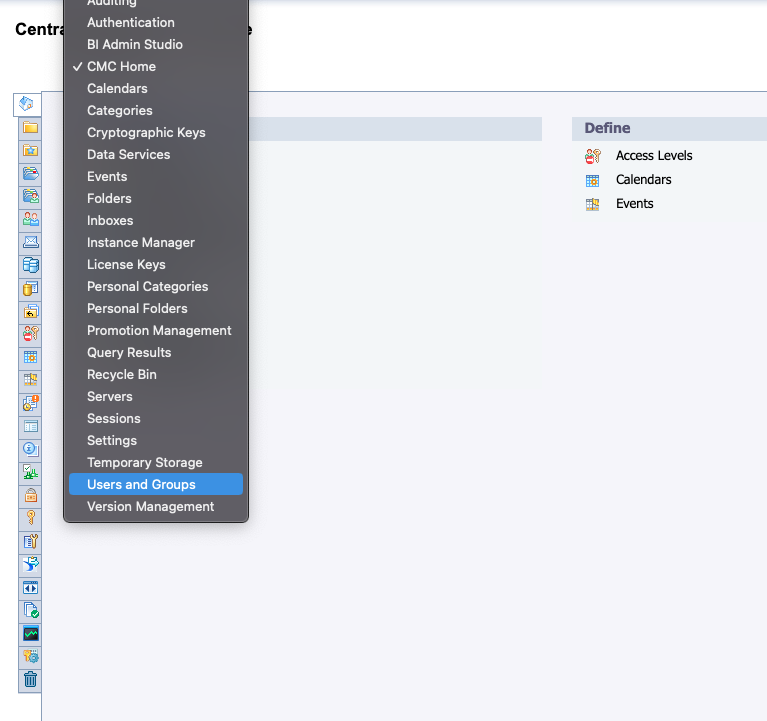
In the Menu click Users and Groups
-
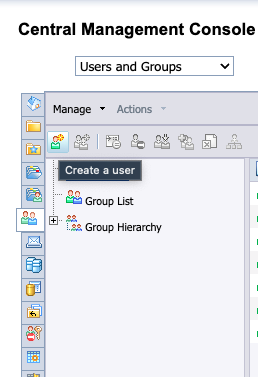
In the User and Groups section click the Create a user button
-
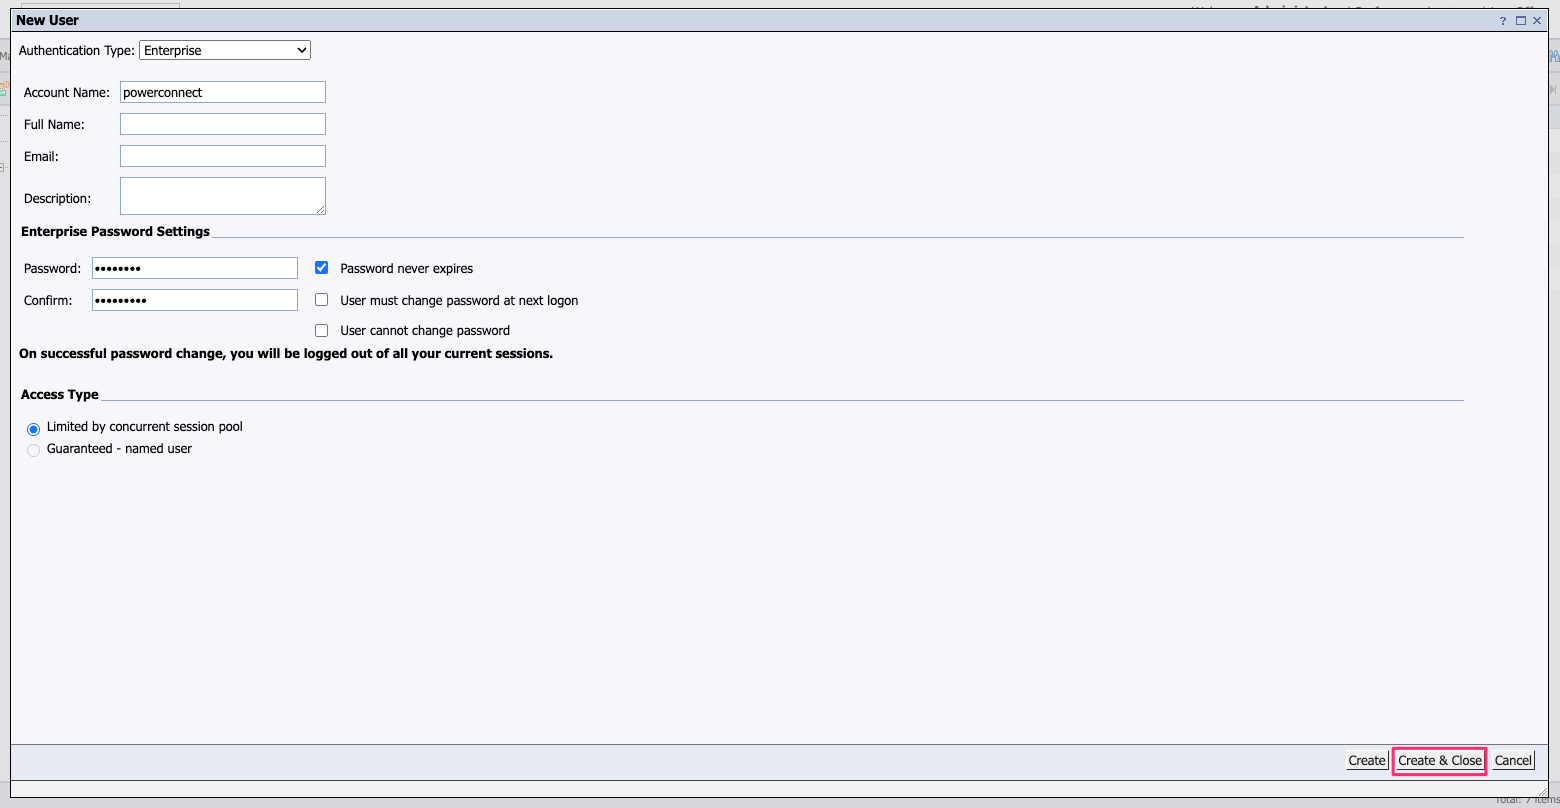
Fill out the details for the new PowerConnect user and note down the new username and password
-
Notes
-
Authentication Type - Should be set to Enterprise
-
Checking the Password never expires option will mean the data flow is not interrupted if the password expires (otherwise remember to update the password when it does)
-
Access Type - the PowerConnect agent should only ever use a single session for data collection and will close that session when the agent is stopped
-
-
-
Click Create & Close
-
In the User List double click the newly created PowerConnect user
-
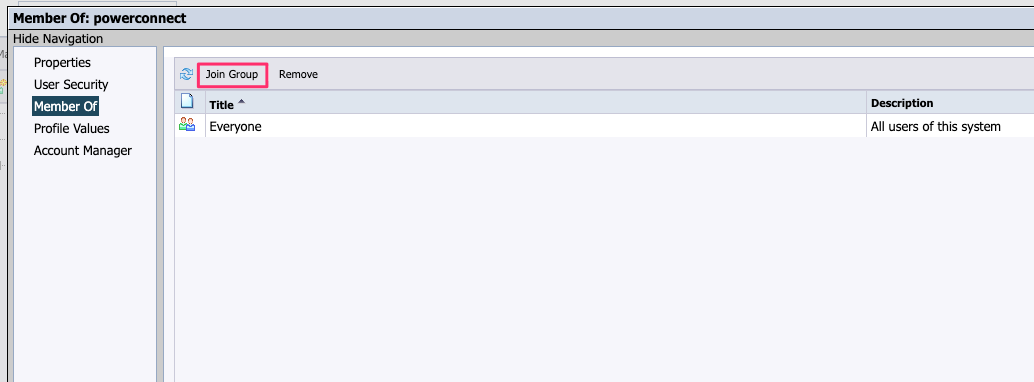
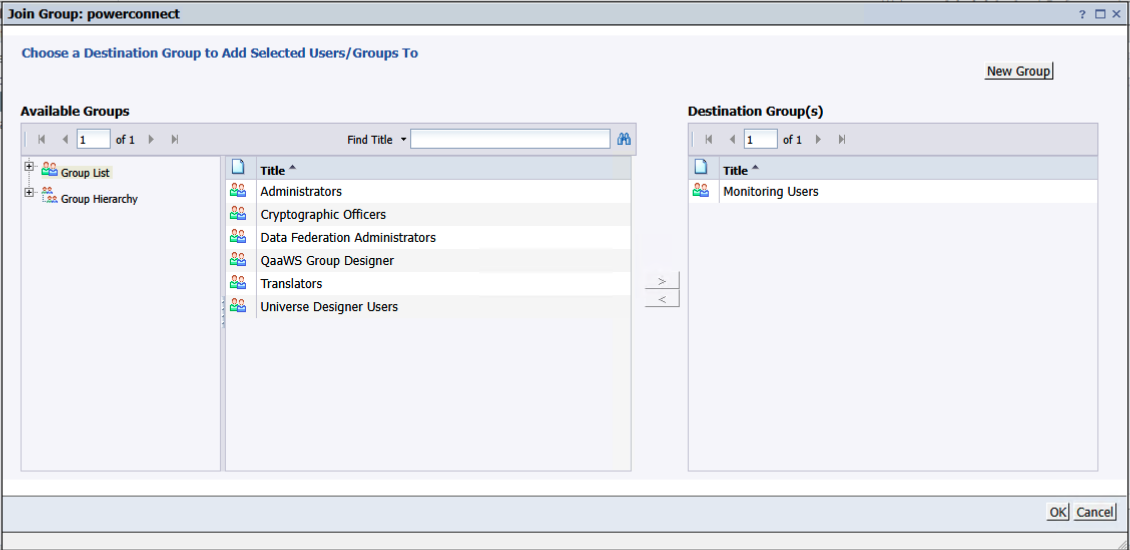
Chose Member Of then Join Group
-
Add the PowerConnect user to the Monitoring Users Groups
-
Click OK
-
The PowerConnect user is now created
Enable JMX in the Business Objects Platform
-
Login to the SAP Business Objects CMS console as a Administrator user
-
For SAP Business Objects 4.3
-
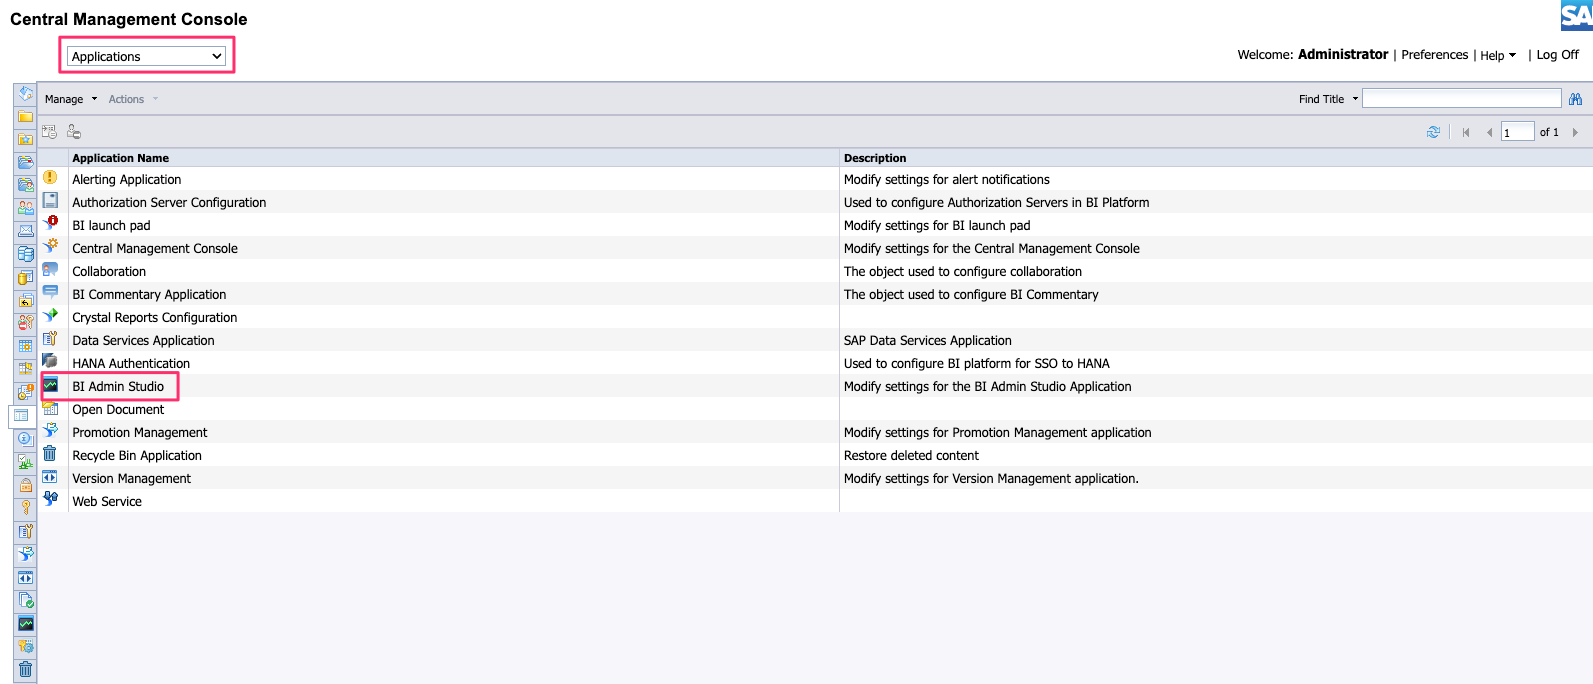
In the Menu click Applications then double click BI Admin Studio
-
-
For SAP Business Objects 4.2
-
In the Menu click Applications then double click Monitoring Application
-
-
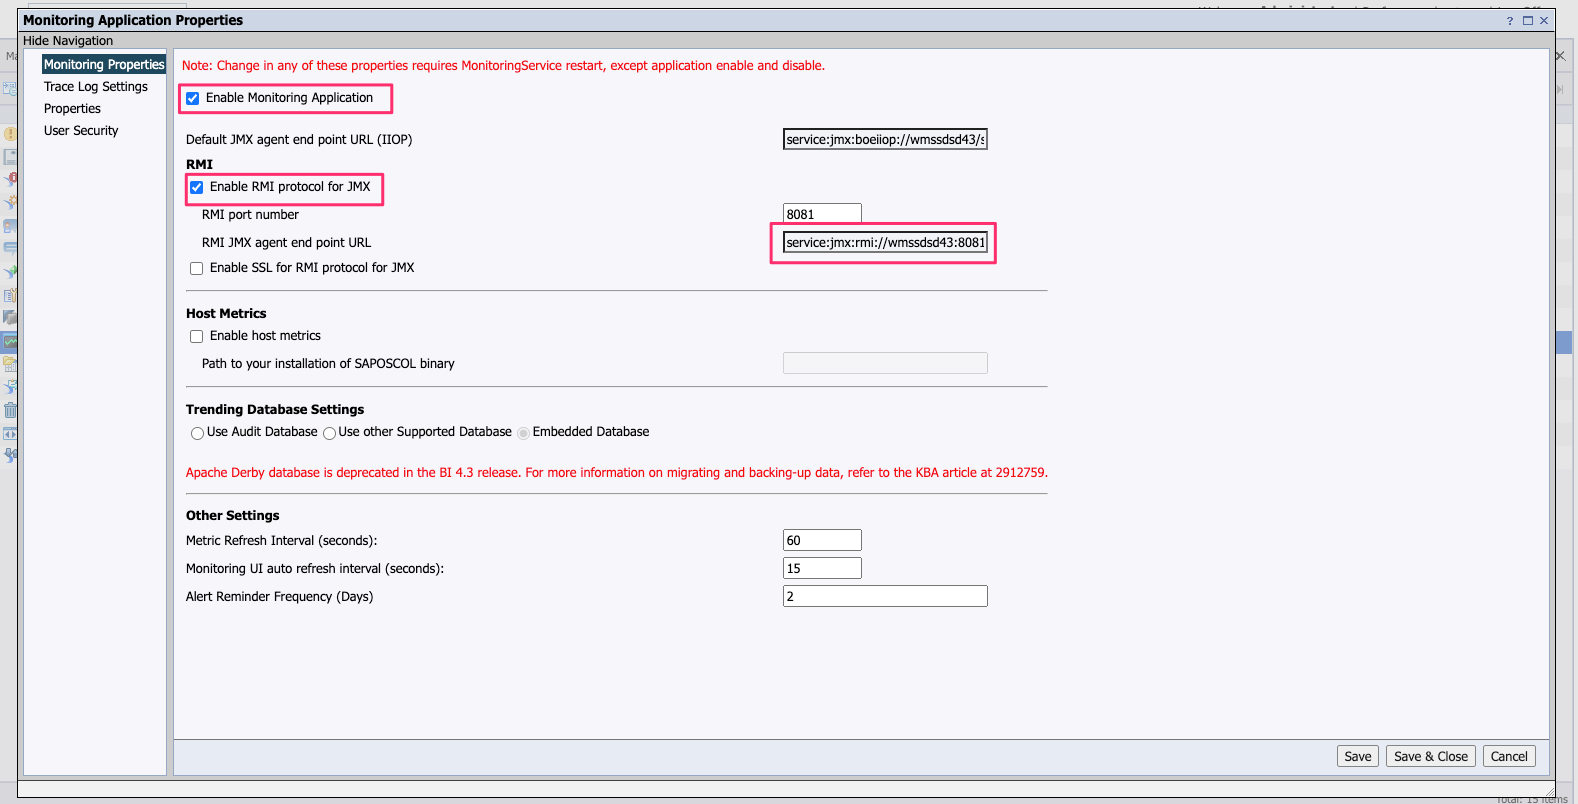
Ensure that the Enabled Monitoring Application is checked and the Enable RMI protocol for JMX is checked
-
Note down the RMI agent end point URL
-
Click Save and Close
-
JMX is now enabled
Create the PowerConnect Agent Configuration files
-
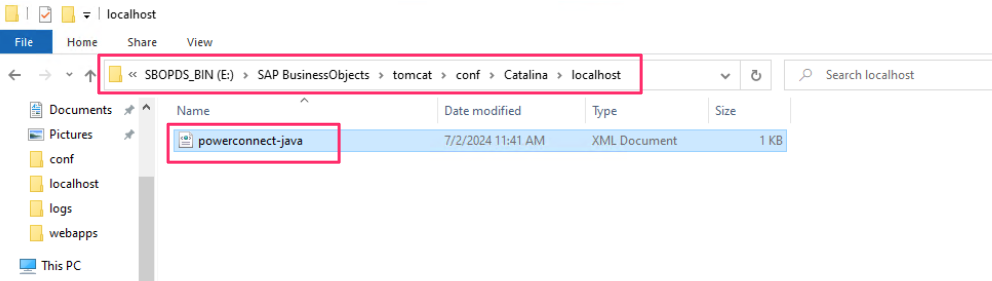
Login to the Business Objects CMC host where Tomcat is installed
-
Browse to the directory:
$BOBJ_HOME/tomcat/conf/Catalina/localhost
-
Create a file in that folder called powerconnect-java.xml
-
Add the following contents:
<Context>
    <Environment name="configurationPath" value="${catalina.home}/conf/powerconnect.properties" type="java.lang.String"/>
</Context>
Note - This file is used by Tomcat to point to the location of the PowerConnect Agent configuration file. In the above example we are storing the file in $BOBJ_HOME/tomcat/conf/powerconnect.properties but you can change this to wherever is suitable for your system as long as the Tomcat user can access this file.
-
Browse to the properties file location in the previous step and create the file

Note - This properties file is used to store the configuration of the PowerConnect Agent. It can be updated directly by editing the file or it can be updated via the PowerConnect Agent UI
-
The pre-installation steps are now complete
Installation Steps
-
Obtain the PowerConnect for SAP Business Objects WAR package from your local distributor
-
Copy the package to the SAP Business Objects CMC host
-
Login to the to the SAP Business Objects CMC host
-
Copy the package to the Tomcat webapps folder
$BOBJ_HOME/tomcat/webapps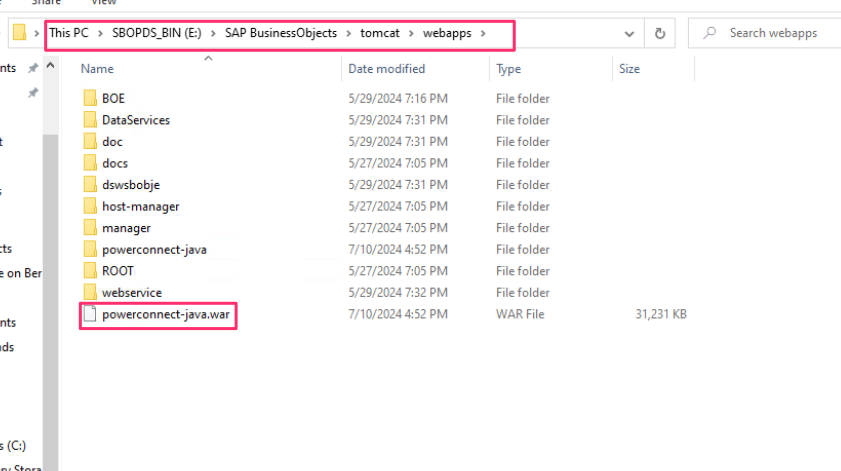
-
Tomcat will now automatically deploy the PowerConnect Agent
-
In a web browser go to : http://<cmchost>:<port>/powerconnect-java/index.html
e.g. http://localhost:8080/powerconnect-java/index.html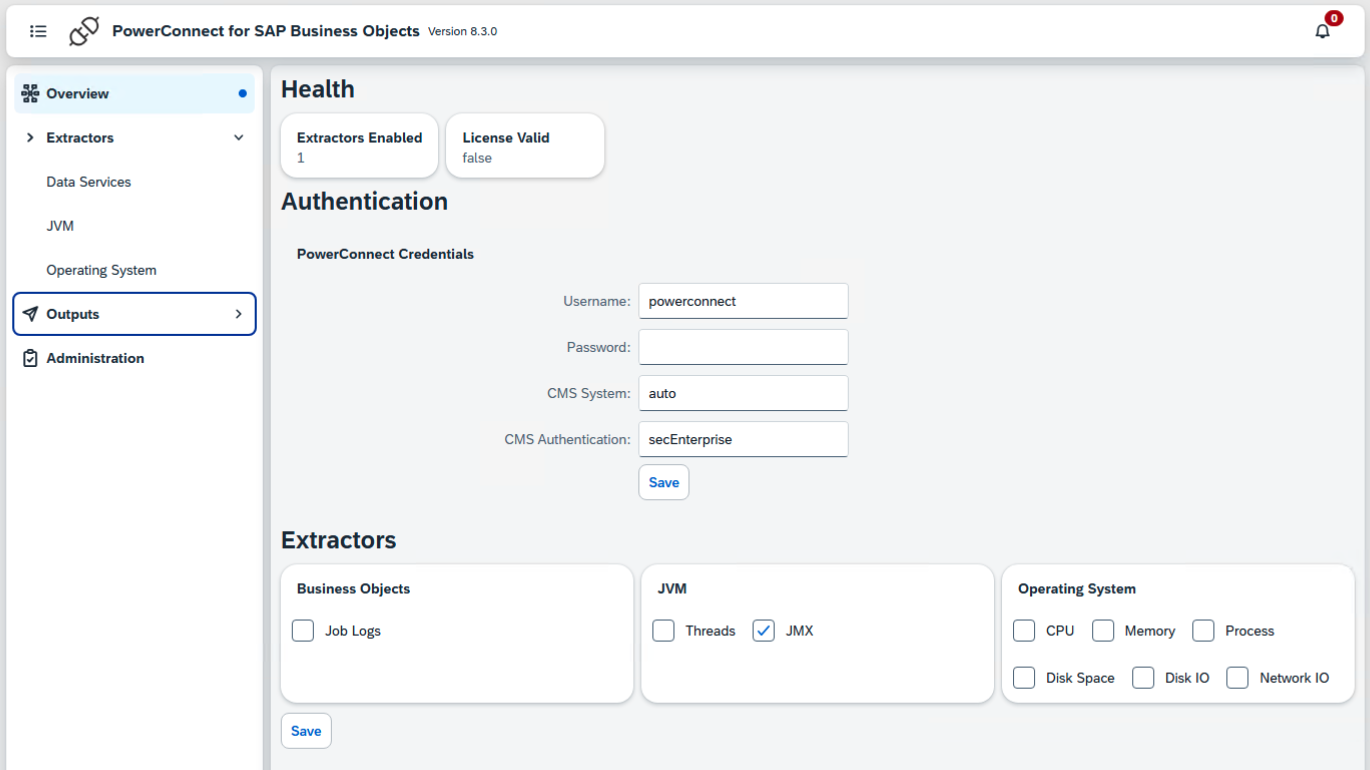
-
The agent is now installed, follow the configuration steps to configure the agent